Subsistema Ubuntu con entorno vulnerable
Hola a todos. Hoy les presentaré un artículo en el que explicaré cómo crear un subsistema Ubuntu en Windows (WSL) para preparar un entorno de pruebas con WebGoat. Una vez configurado el entorno, también veremos cómo automatizar el servicio para que se inicie automáticamente al acceder al subsistema
Instalación del volumen
- Para empezar, abriremos PowerShell y escribiremos este comando para instalar el subsistema de Ubuntu
  PS C:\WINDOWS\> wsl --install -d Ubuntu --name Ubuntu_webgoat
  Descargando: Ubuntu
  Instalando: Ubuntu
  Distribución instalada correctamente. Se puede iniciar a través de "wsl.exe -d Ubuntu_webgoat"
  Iniciando Ubuntu_webgoat...
  Provisioning the new WSL instance Ubuntu_webgoat
  This might take a while...
  Create a default Unix user account: webgoat
  New password:
  Retype new password:
  passwd: password updated successfully
  To run a command as administrator (user "root"), use "sudo <command>".
  See "man sudo_root" for details.

  webgoat@user:~$ whoami
  webgoat
Una vez instalado, actualizaremos el sistema e instalaremos Docker y esto
  root@user:/home/webgoat# sudo apt update && sudo apt upgrade -y
  Get:1 http://security.ubuntu.com/ubuntu noble-security InRelease [126 kB]
  Hit:2 http://archive.ubuntu.com/ubuntu noble InRelease
  Get:3 http://security.ubuntu.com/ubuntu noble-security/main amd64 Packages [1349 kB]
  Get:4 http://archive.ubuntu.com/ubuntu noble-updates InRelease [126 kB]
  ...
root@user:/home/webgoat# sudo apt install -y docker.io Reading package lists... Done Building dependency tree... Done Reading state information... Done The following package was automatically installed and is no longer required: libllvm19 Use 'sudo apt autoremove' to remove it. The following additional packages will be installed: bridge-utils containerd dns-root-data dnsmasq-base iptables libip4tc2 libip6tc2 libnetfilter-conntrack3Activaremos el servicio Docker para que se inicie nada más iniciar Ubuntu
root@user:/home/webgoat# sudo systemctl enable --now dockerCreación del servicio webgoat
Para poder crear el servicio, generaremos un fichero llamado webgoat.service en /etc/systemd/system/webgoat.service
  [Unit]
  Description=WebGoat Docker Service
  After=docker.service
  Requires=docker.service

  [Service]
  Restart=always
  ExecStart=/usr/bin/docker run --rm \
    -p 8080:8080 \
    -e TZ=Europe/Madrid \
    --name webgoat \
    webgoat/webgoat:latest
  ExecStop=/usr/bin/docker stop webgoat

  [Install]
  WantedBy=multi-user.target
Una vez creado, activaremos el deamon y el nuevo servicio webgoat
  root@userr:/home/webgoat# sudo systemctl daemon-reload
  root@userr:/home/webgoat# sudo systemctl enable --now webgoat
  Created symlink /etc/systemd/system/multi-user.target.wants/webgoat.service → /etc/systemd/system/webgoat.service.
  root@userr:/home/webgoat#
Y verificaremos que se ha ejecutado sin ningún problema con
sudo systemctl status webgoatroot@user:/home/webgoat# sudo systemctl status webgoat ● webgoat.service - WebGoat Docker Service Loaded: loaded (/etc/systemd/system/webgoat.service; enabled; preset: enabled) Active: active (running) since Sun 2025-12-07 20:20:20 CET; 1min 26s ago Main PID: 4819 (docker) Tasks: 9 (limit: 18605) Memory: 9.0M (peak: 9.5M) CPU: 92ms CGroup: /system.slice/webgoat.service └─4819 /usr/bin/docker run --rm -p 8080:8080 -e TZ=Europe/Madrid --name webgoat webgoat/webgoat:latest
Instalación de nginx
Para poder cargar automáticamente el servicio WebGoat, tendremos que instalar Nginx
  root@user:/home/webgoat# sudo apt install -y nginx
  Hit:1 http://security.ubuntu.com/ubuntu noble-security InRelease
  Hit:2 http://archive.ubuntu.com/ubuntu noble InRelease
  Hit:3 http://archive.ubuntu.com/ubuntu noble-updates InRelease
  Hit:4 http://archive.ubuntu.com/ubuntu noble-backports InRelease
  ...
Verificaremos que el servicio esté activo
root@user:/home/webgoat# systemctl  enable nginx
Synchronizing state of nginx.service with SysV service script with /usr/lib/systemd/systemd-sysv-install.
Executing: /usr/lib/systemd/systemd-sysv-install enable nginx
root@user:/home/webgoat#


root@user:/home/webgoat# sudo systemctl status nginx
● nginx.service - A high performance web server and a reverse proxy server
     Loaded: loaded (/usr/lib/systemd/system/nginx.service; enabled; preset: enabled)
     Active: active (running) since Sun 2025-12-07 20:20:45 CET; 40s ago
       Docs: man:nginx(8)
    Process: 7515 ExecStartPre=/usr/sbin/nginx -t -q -g daemon on; master_process on; (code=exited, status=0/SUCCESS)
    Process: 7517 ExecStart=/usr/sbin/nginx -g daemon on; master_process on; (code=exited, status=0/SUCCESS)
   Main PID: 7559 (nginx)
      Tasks: 17 (limit: 18605)
Crearemos el fichero entorno.prueba
Se creará el fichero en /etc/nginx/sites-available/entorno.prueba
  # Redirigir cualquier petición por IP al dominio
  server {
      listen 80;
      server_name _;  # captura cualquier host no definido

      return 301 http://entorno.prueba$request_uri;
  }

  # Configuración principal del dominio
  server {
      listen 80;
      server_name entorno.prueba www.entorno.prueba;

      location / {
          proxy_pass http://127.0.0.1:8080/WebGoat/;
          proxy_set_header Host $host;
          proxy_set_header X-Real-IP $remote_addr;
          proxy_set_header X-Forwarded-For $proxy_add_x_forwarded_for;
      }
  }
Crear enlace simbólico, esto activara la configuración del sitio entorno.prueba. Una vez realizado esto recargaremos Nginx para aplicar los cambios
  root@user:/home/webgoat# sudo ln -s /etc/nginx/sites-available/entorno.prueba /etc/nginx/sites-enabled/
 /etc/nginx/sites-enabled/
  root@user:/home/webgoat# sudo nginx -t
  2025/12/07 13:09:52 [warn] 8728#8728: conflicting server name "_" on 0.0.0.0:80, ignored
  nginx: the configuration file /etc/nginx/nginx.conf syntax is ok
  nginx: configuration file /etc/nginx/nginx.conf test is successful
  root@user:/home/webgoat#

  root@user:/home/webgoat# sudo systemctl reload nginx
  root@user:/home/webgoat#
En nuestro /etc/hosts tendremos que hacer que la IP resuelva al dominio
127.0.0.1 entorno.prueba
Y en Windows tendremos que ir a C:\Windows\System32\drivers\etc\hosts y redirigir la IP al dominio
127.0.0.1 entorno.prueba
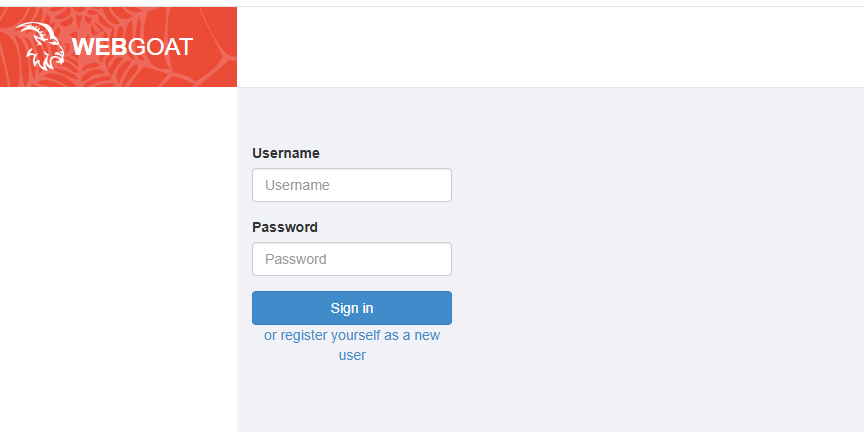
Acceso al entorno de prueba Webgoat
Una vez realizados todos los pasos, si accedemos a http://entorno.prueba:8080/WebGoat/login, deberíamos poder ver algo como la imagen
Finalización
Espero que hayan aprendido mucho haciendo entorno vulnerable y les haya servido de ayuda mi explicación. Muchas gracias por leer el artículo y no olviden seguirme en GitHub, ya que también iré subiendo herramientas de hacking.